
Yotsuba 7 Piece Knife Set: Which Knife for Which Job
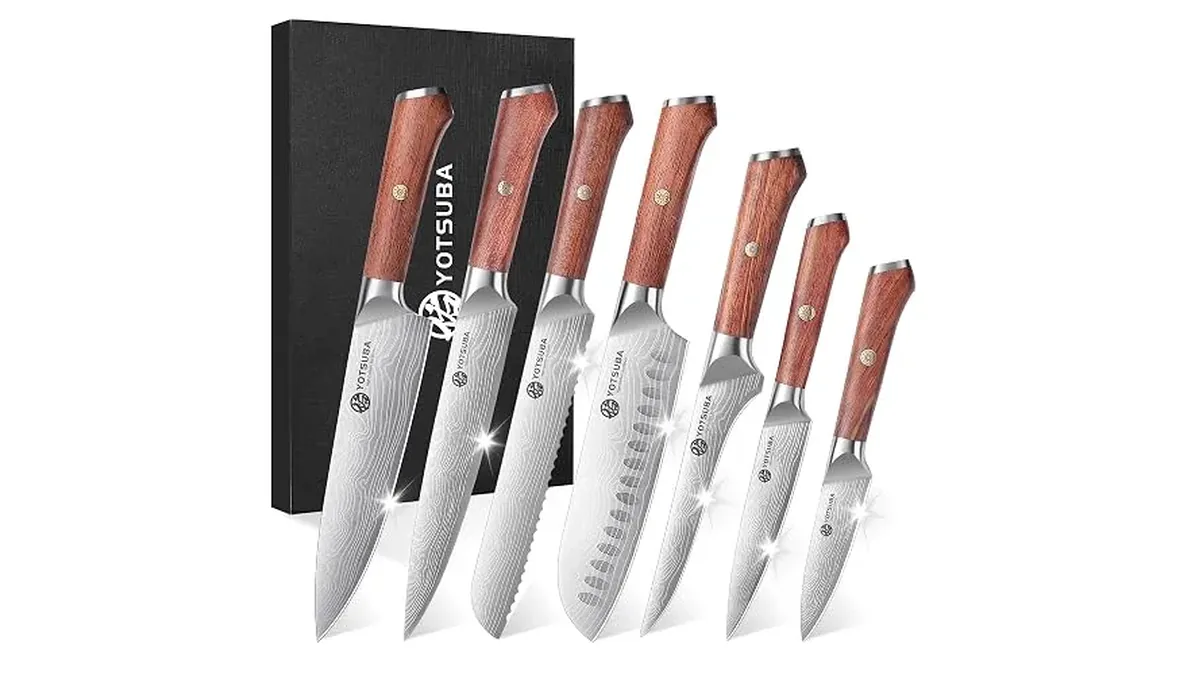
Use the chef knife or santoku for most board work, then switch to a specialist blade when the food calls for it. The 7PCS Rosewood Knife Set belongs to Yotsuba's Milano series. The five knives identified in the product images are the chef, santoku, bread, boning and utility knives. Check the complete package contents before ordering.
Choose one main blade for the prep
The 8-inch chef knife and 7-inch santoku overlap, so you do not need both beside the board for every meal. Choose the chef if you prefer a rocking motion for herbs and general preparation. Choose the santoku when a flatter, straighter chopping action feels more natural for vegetables and even slices.
Try thinking in terms of the motion before the ingredient. An onion does not demand a different knife simply because another recipe uses a santoku. Keep your chosen main blade on the board and work at a pace you can control. The gyuto vs santoku vs nakiri guide explains the shape differences if you are still choosing your preferred style.
Use the bread knife when the surface resists
The 8-inch bread knife is useful for a crusty loaf because its teeth engage the outer surface while the softer interior needs little pressure. Use long, light sawing strokes rather than pushing down to force the cut. Support the food on the board and let the blade progress through it.
The same approach can help with a ripe tomato or a cake layer. The practical question is whether the outer surface starts the cut cleanly. If you find yourself crushing the food, change your approach instead of leaning harder on the handle. This blade has a specific role; it is not a reason to use a sawing action for every vegetable.
Keep boning work precise
The 8-inch boning knife has a narrower blade for trimming meat and working close to joints and bone. Make short, deliberate strokes with the tip while exposing the next area to cut. Working in small stages makes the line of the cut easier to see than attempting one forceful pass through an obscured joint.
The task is separating tissue, not breaking bone. Do not twist the blade as a lever or use it on frozen food. If progress depends on prying, pause and reconsider the job rather than forcing this knife. Its fine edge is intended to slice, and a specialist shape does not turn it into a cleaver.
Reach for the utility knife for a smaller workspace
The 5-inch utility blade suits small ingredients such as a shallot, garlic, citrus or fruit. It can be easier to position for a short cut when the full length of the chef knife is unnecessary. Keep the food supported on a board rather than assuming a smaller knife makes any in-hand task suitable.
Choose by the size of the cut as well as the size of the ingredient. If a utility blade leaves you struggling to span the food, return to the main knife. Switching should reduce awkward movement. It should not become a rule that every small ingredient requires a separate blade and another cleaning step.
Understand the steel without promising performance
Yotsuba lists 5Cr15MoV high-carbon stainless steel, about 56 Rockwell hardness and an edge around 14 degrees per side. Those details describe the set; they do not tell you how many meals you can prepare before sharpening. Cutting surface, technique and care remain part of that answer.
The concave blade pattern is described by Yotsuba as reducing drag and food sticking. Do not expect every slice to fall away unaided. If food accumulates on the blade, clear it deliberately rather than changing to forceful chopping. The rosewood handles have metal frames and colored studs, and their natural grain can vary from one knife to the next.
Clean while the job is still manageable
Yotsuba recommends warm water and mild soap, followed by thorough rinsing and complete drying with a soft towel. Keep the knives out of the dishwasher and avoid soaking. After raw-meat preparation, clean the knife and board before moving to other food rather than leaving everything in a crowded sink until dinner is finished.
Use wood or soft plastic as the cutting surface. When the edge starts sliding instead of starting a cut, address the edge rather than adding pressure. Honing and sharpening are different jobs; if sharpening is needed, use the factory angle as the reference. The sharpening angle guide explains how to approach that choice.
Put the set into a meal-prep sequence
Before starting, group the jobs by ingredient and keep only the knives those jobs need near the board. Prepare ready-to-eat ingredients separately from raw meat, and clean the working area before changing tasks. Put each used knife in a visible, designated place rather than hiding it under peelings or dropping it into washing water.
When food is ready to move, use a suitable scraper or container rather than treating a fine cutting edge as a general clearing tool. At the end, account for the knives you took out before returning them dry to storage. This gives each piece a deliberate place in the routine and makes the set easier to manage than leaving every blade on the counter throughout cooking.
Choose storage separately from the knife count
The magnetic-lid gift box is not a countertop block and does not include a sharpener. Keep the supplied storage layout intact rather than dropping exposed knives together in a drawer. Decide whether taking a box out for each cooking session suits your kitchen before choosing it mainly as a gift presentation.
For countertop storage with a built-in sharpener, compare the 15-Piece Knife Block Set. For long barbecue slicing, the 7PCS + 12-inch Brisket BBQ bundle adds a carver. Browse Knife Sets by the tools and storage you will use, not simply by the highest piece count.